Task 3 Deliver & Verify

Deliver with confidence - verify what you’ve promised.

This task is about trust. You’ll prove that what was planned and contracted is exactly what’s being delivered - before anything reaches the client.

Your role - Appointed Party + Lead Appointed Party Output - Verified models, approved documents, structured handover

What you will do

1. Verify the models

Check the assigned demo models against the defined information requirements.

2. Organise deliverables

Structure deliverables and complete upload the required document.

3. Handover

Export the final, verified handover package.

Step 1 - Quality assurance (verify the models)

Module - Verify

Before issuing anything externally, Appointed Parties must confirm that the model content matches the agreed scope and information requirements. This is your internal safety net.

Required Checklist
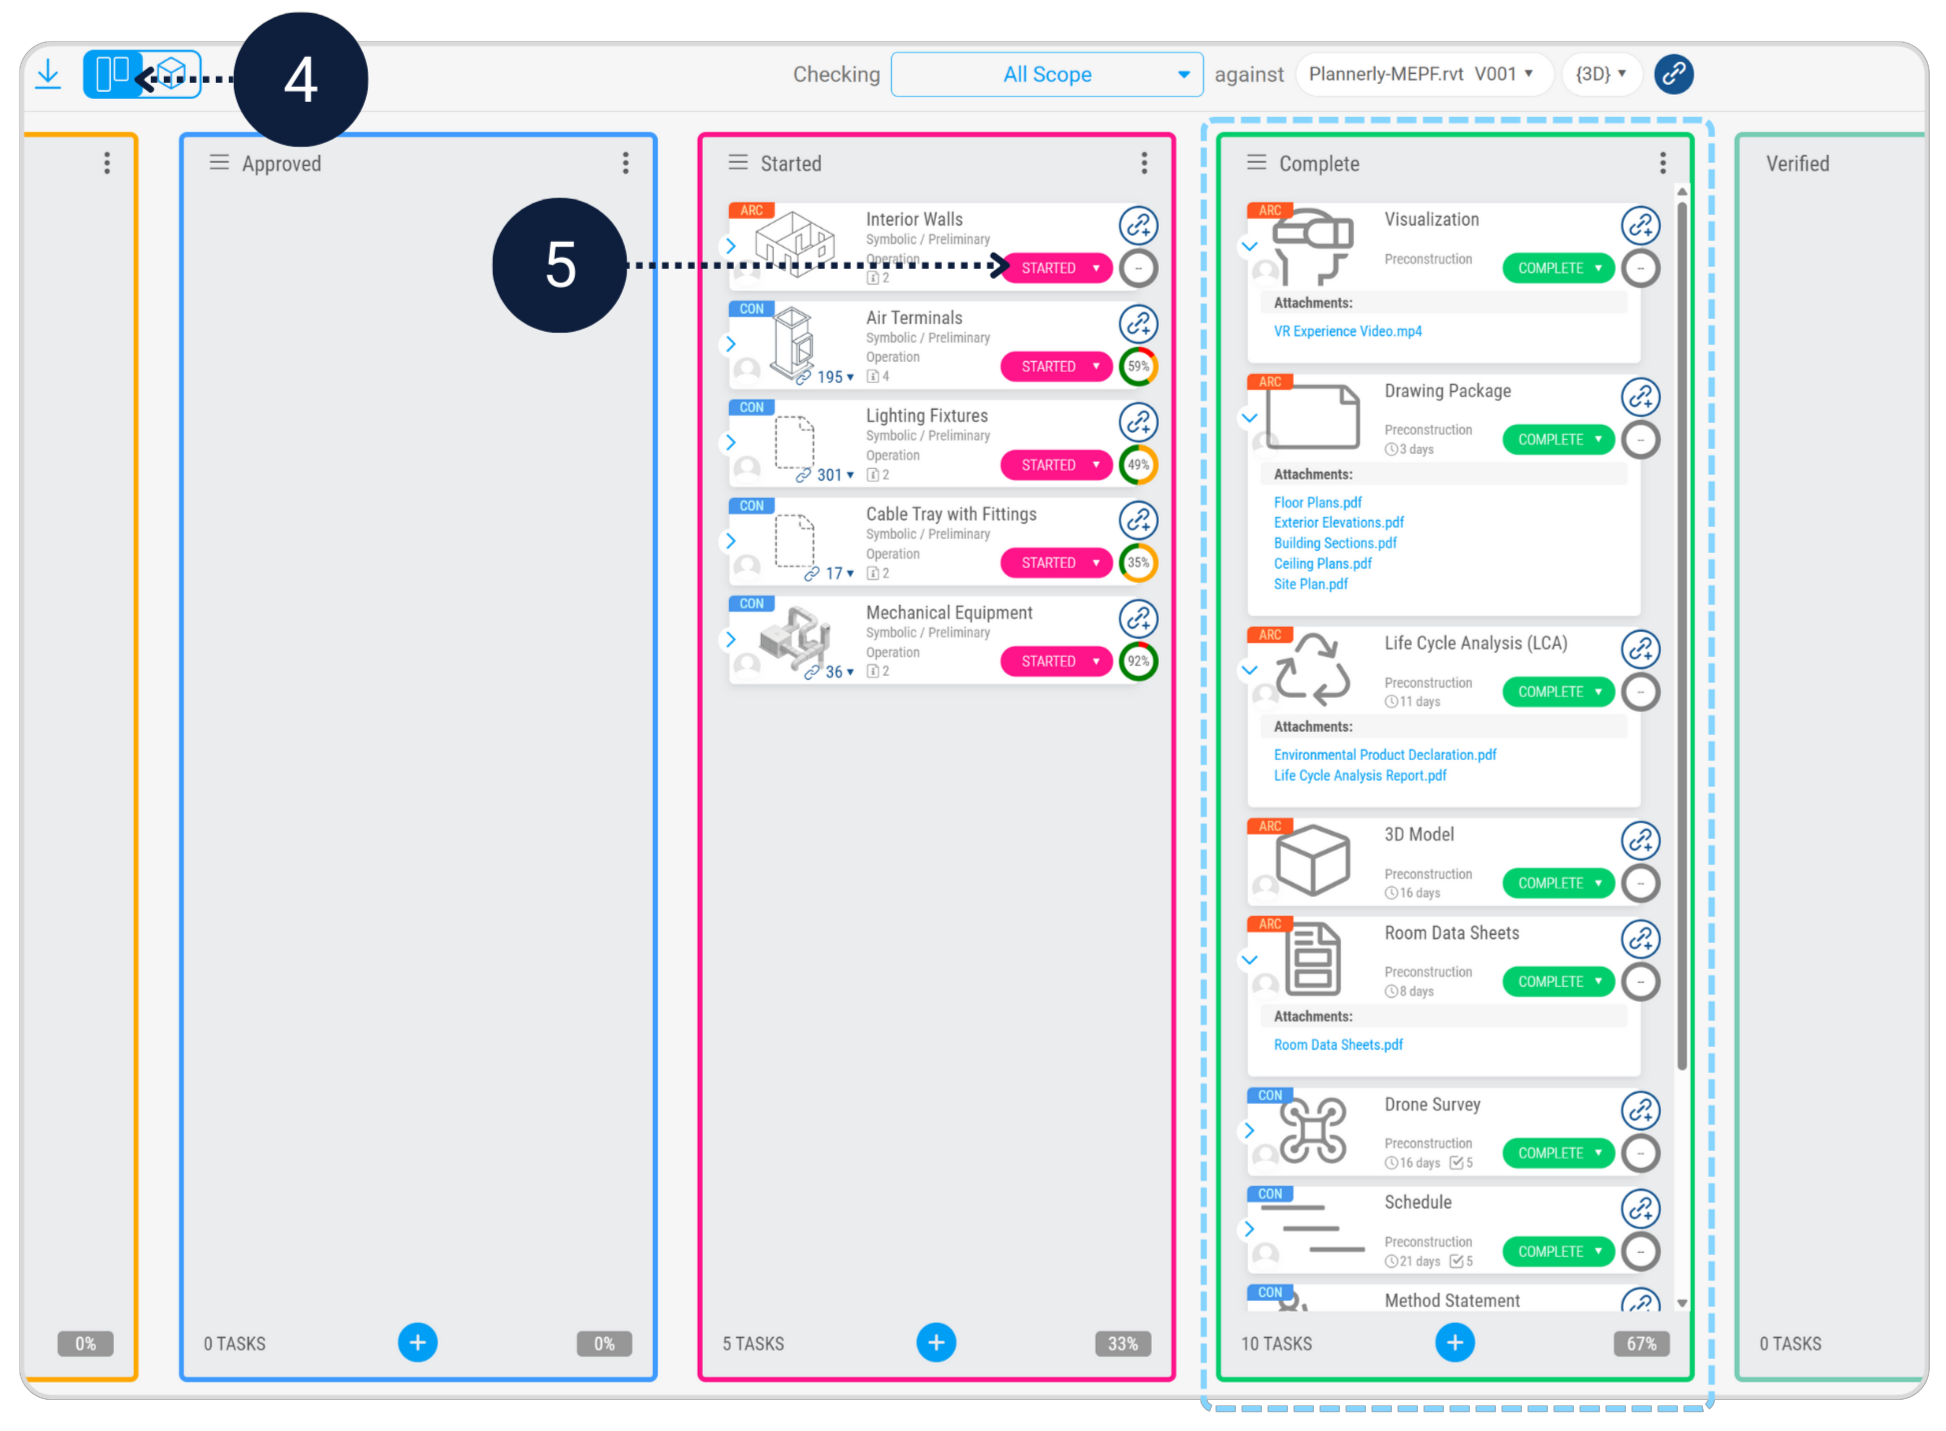
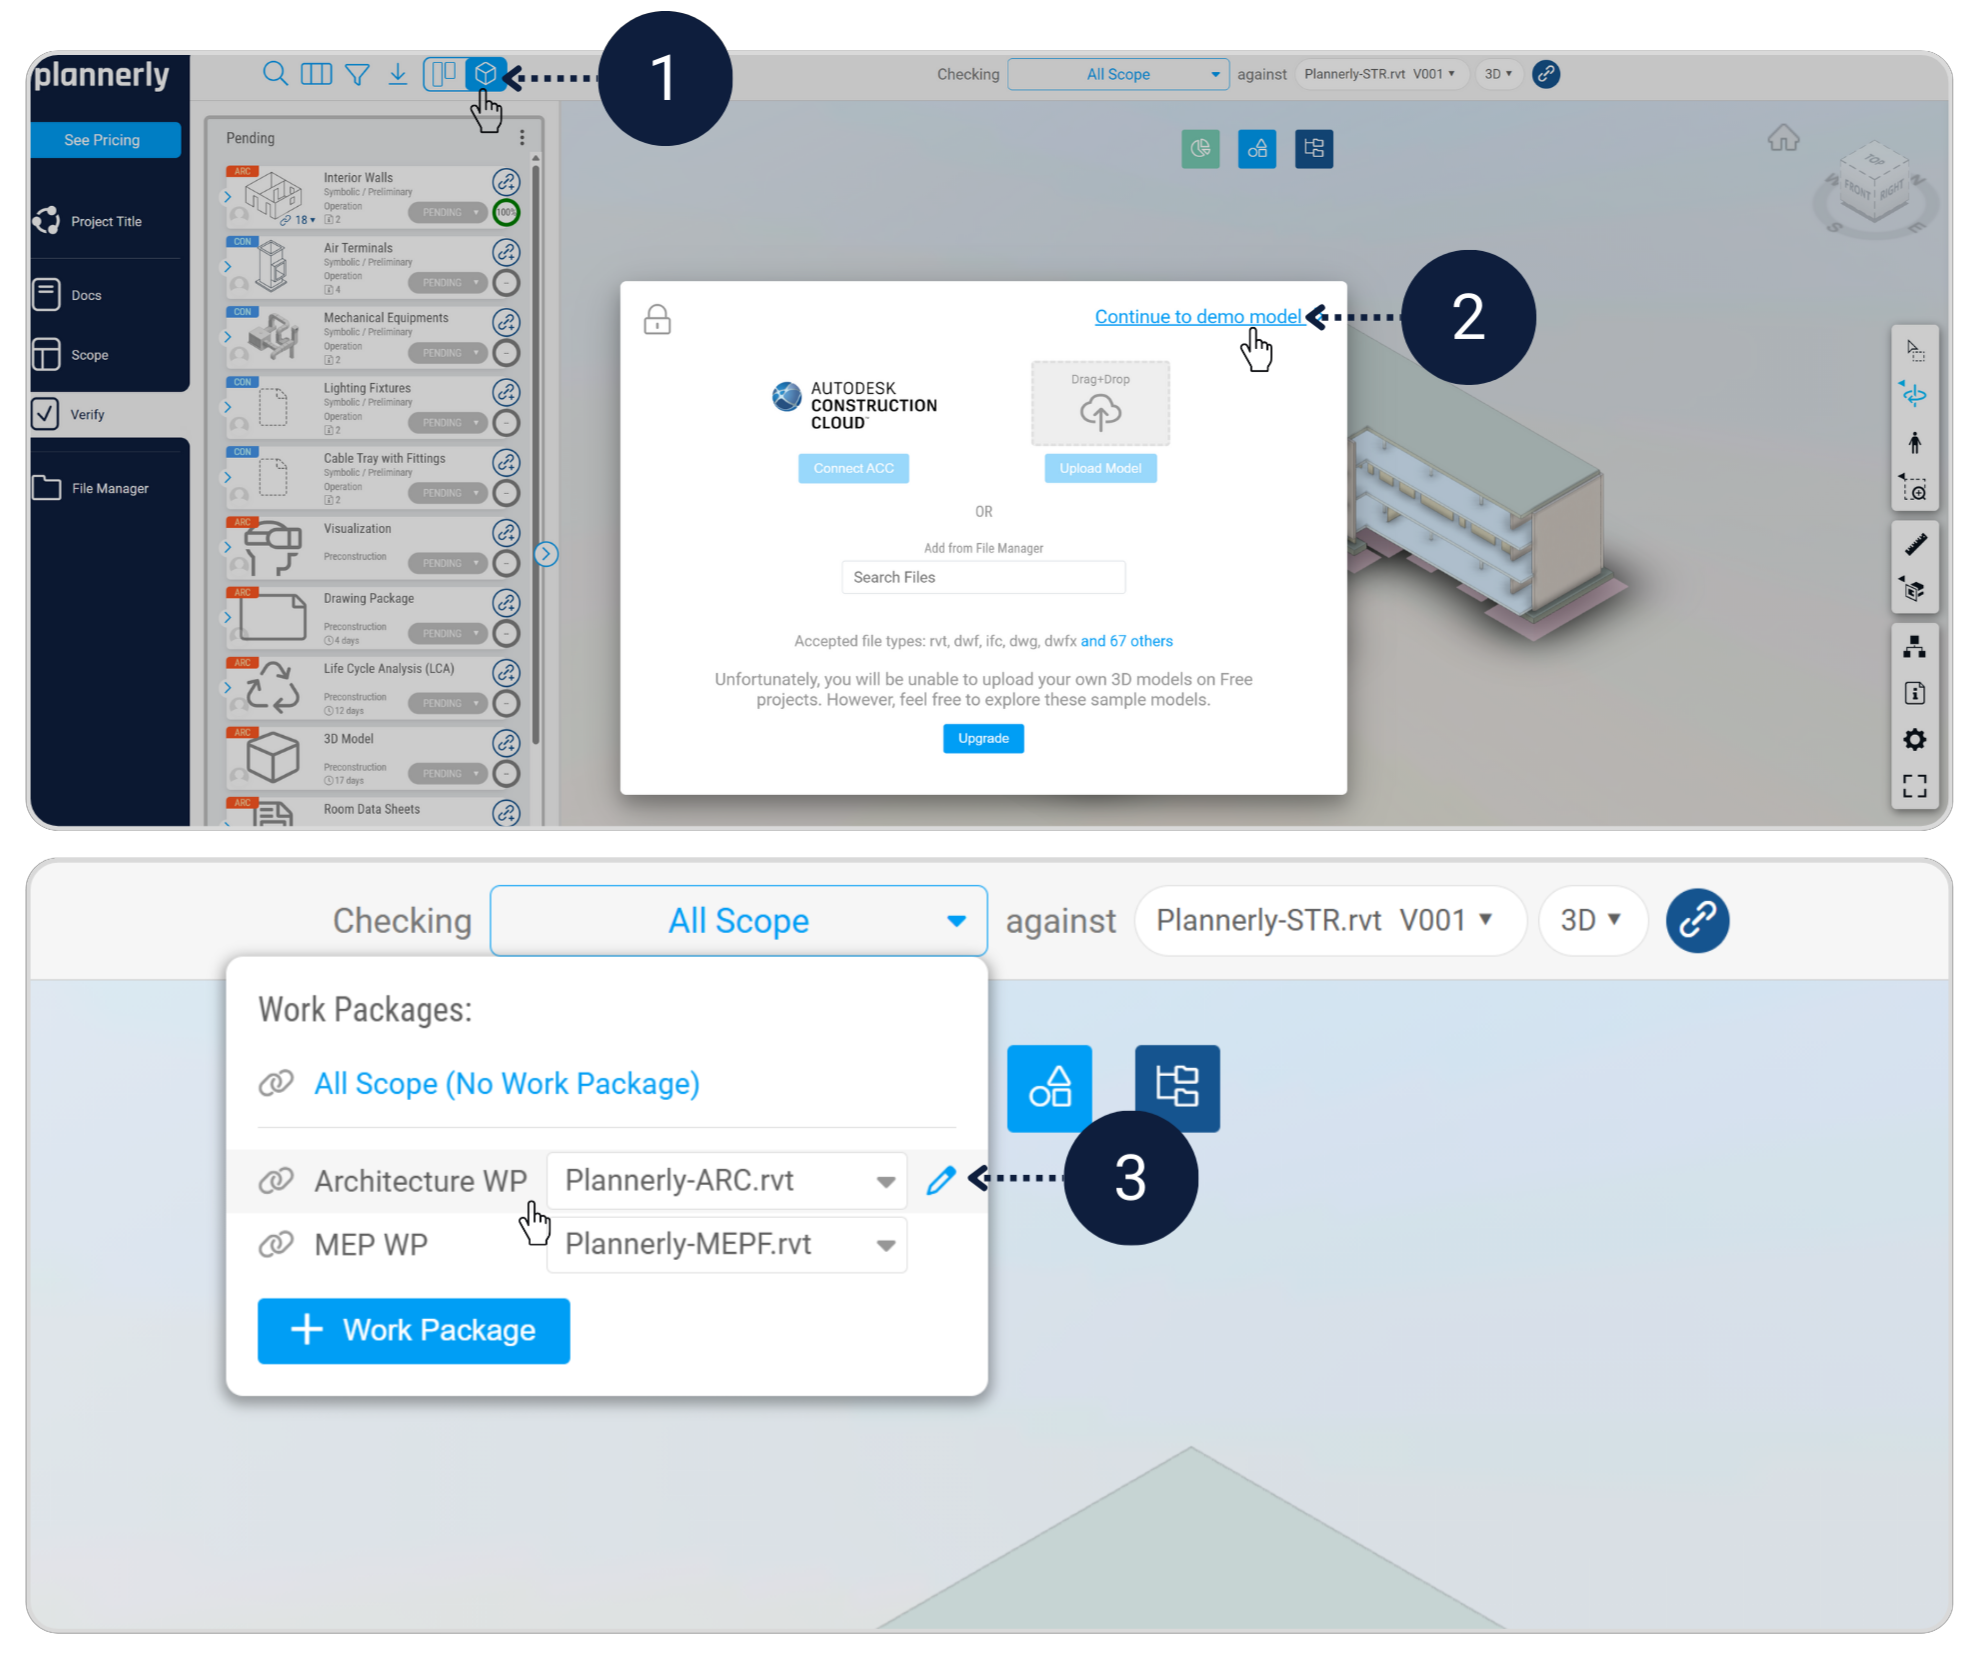
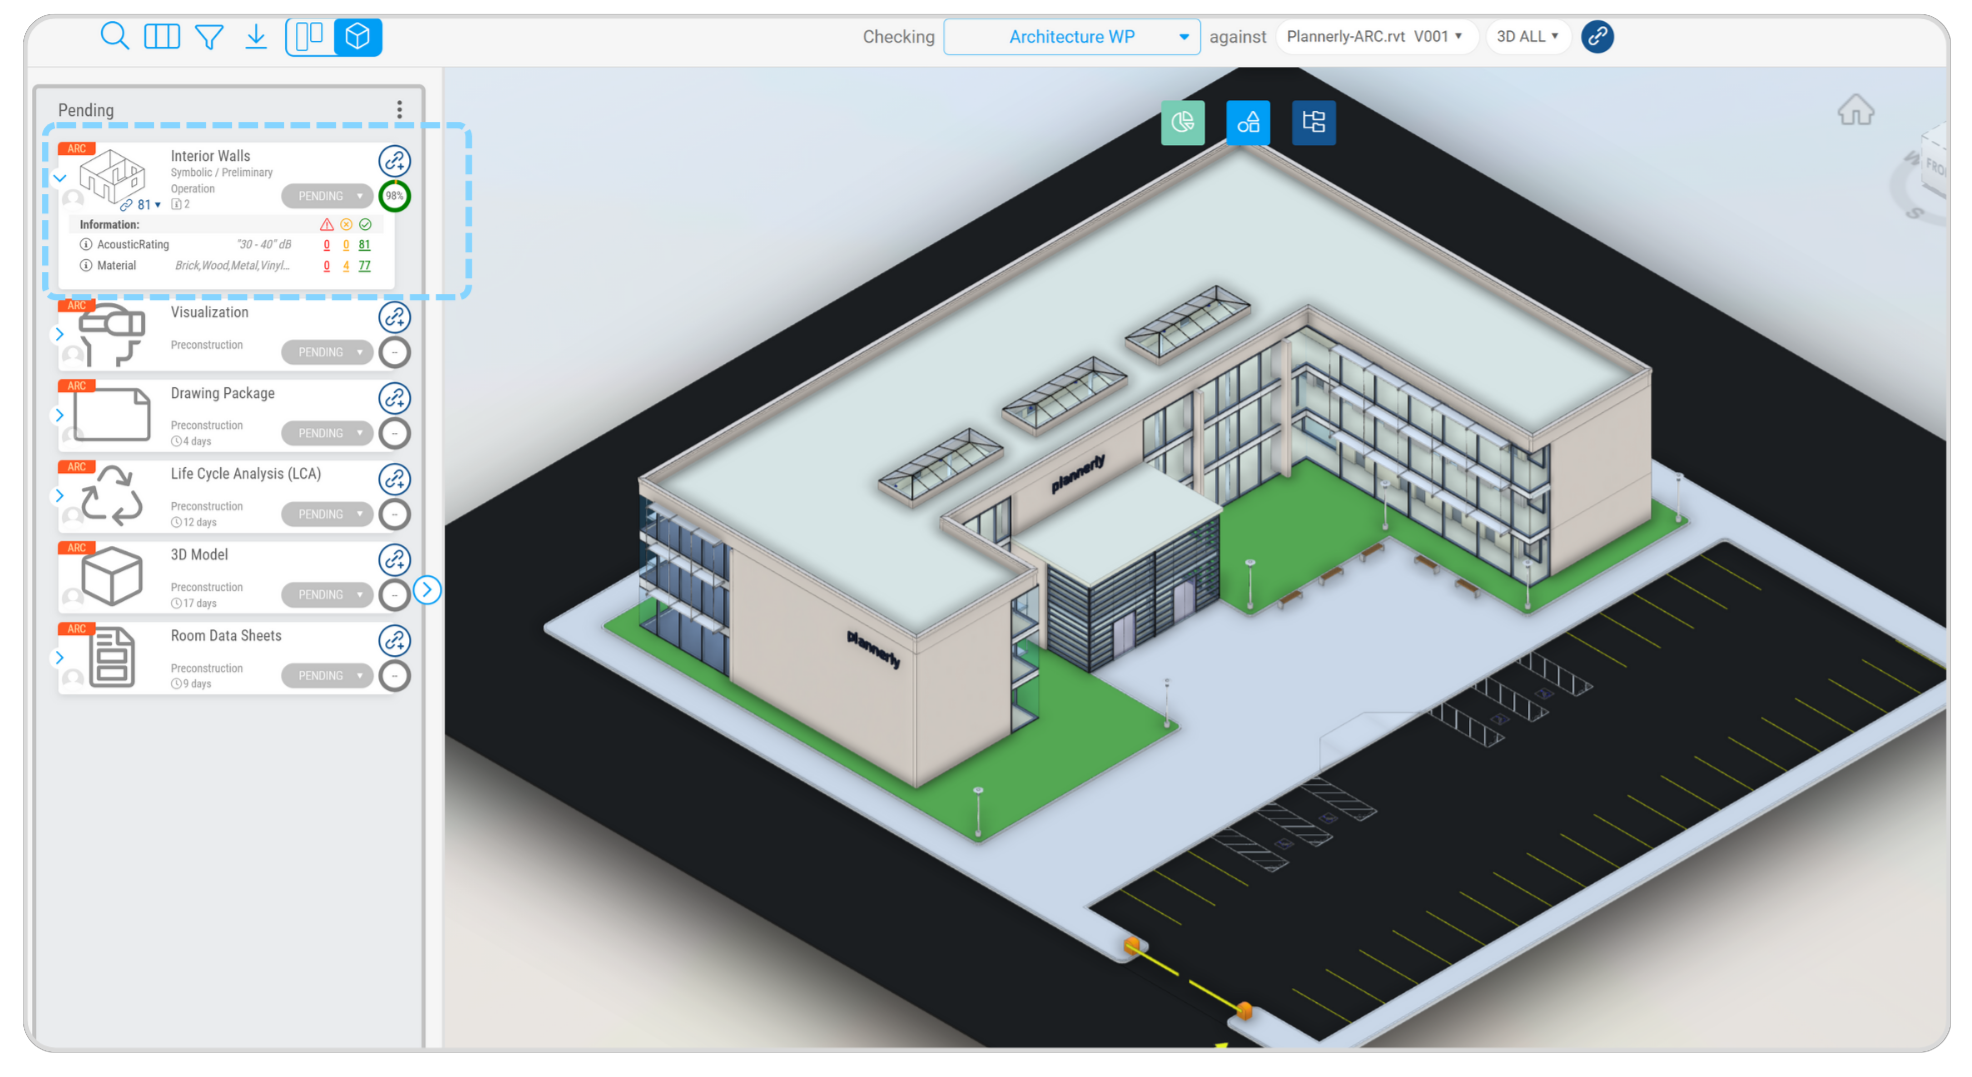
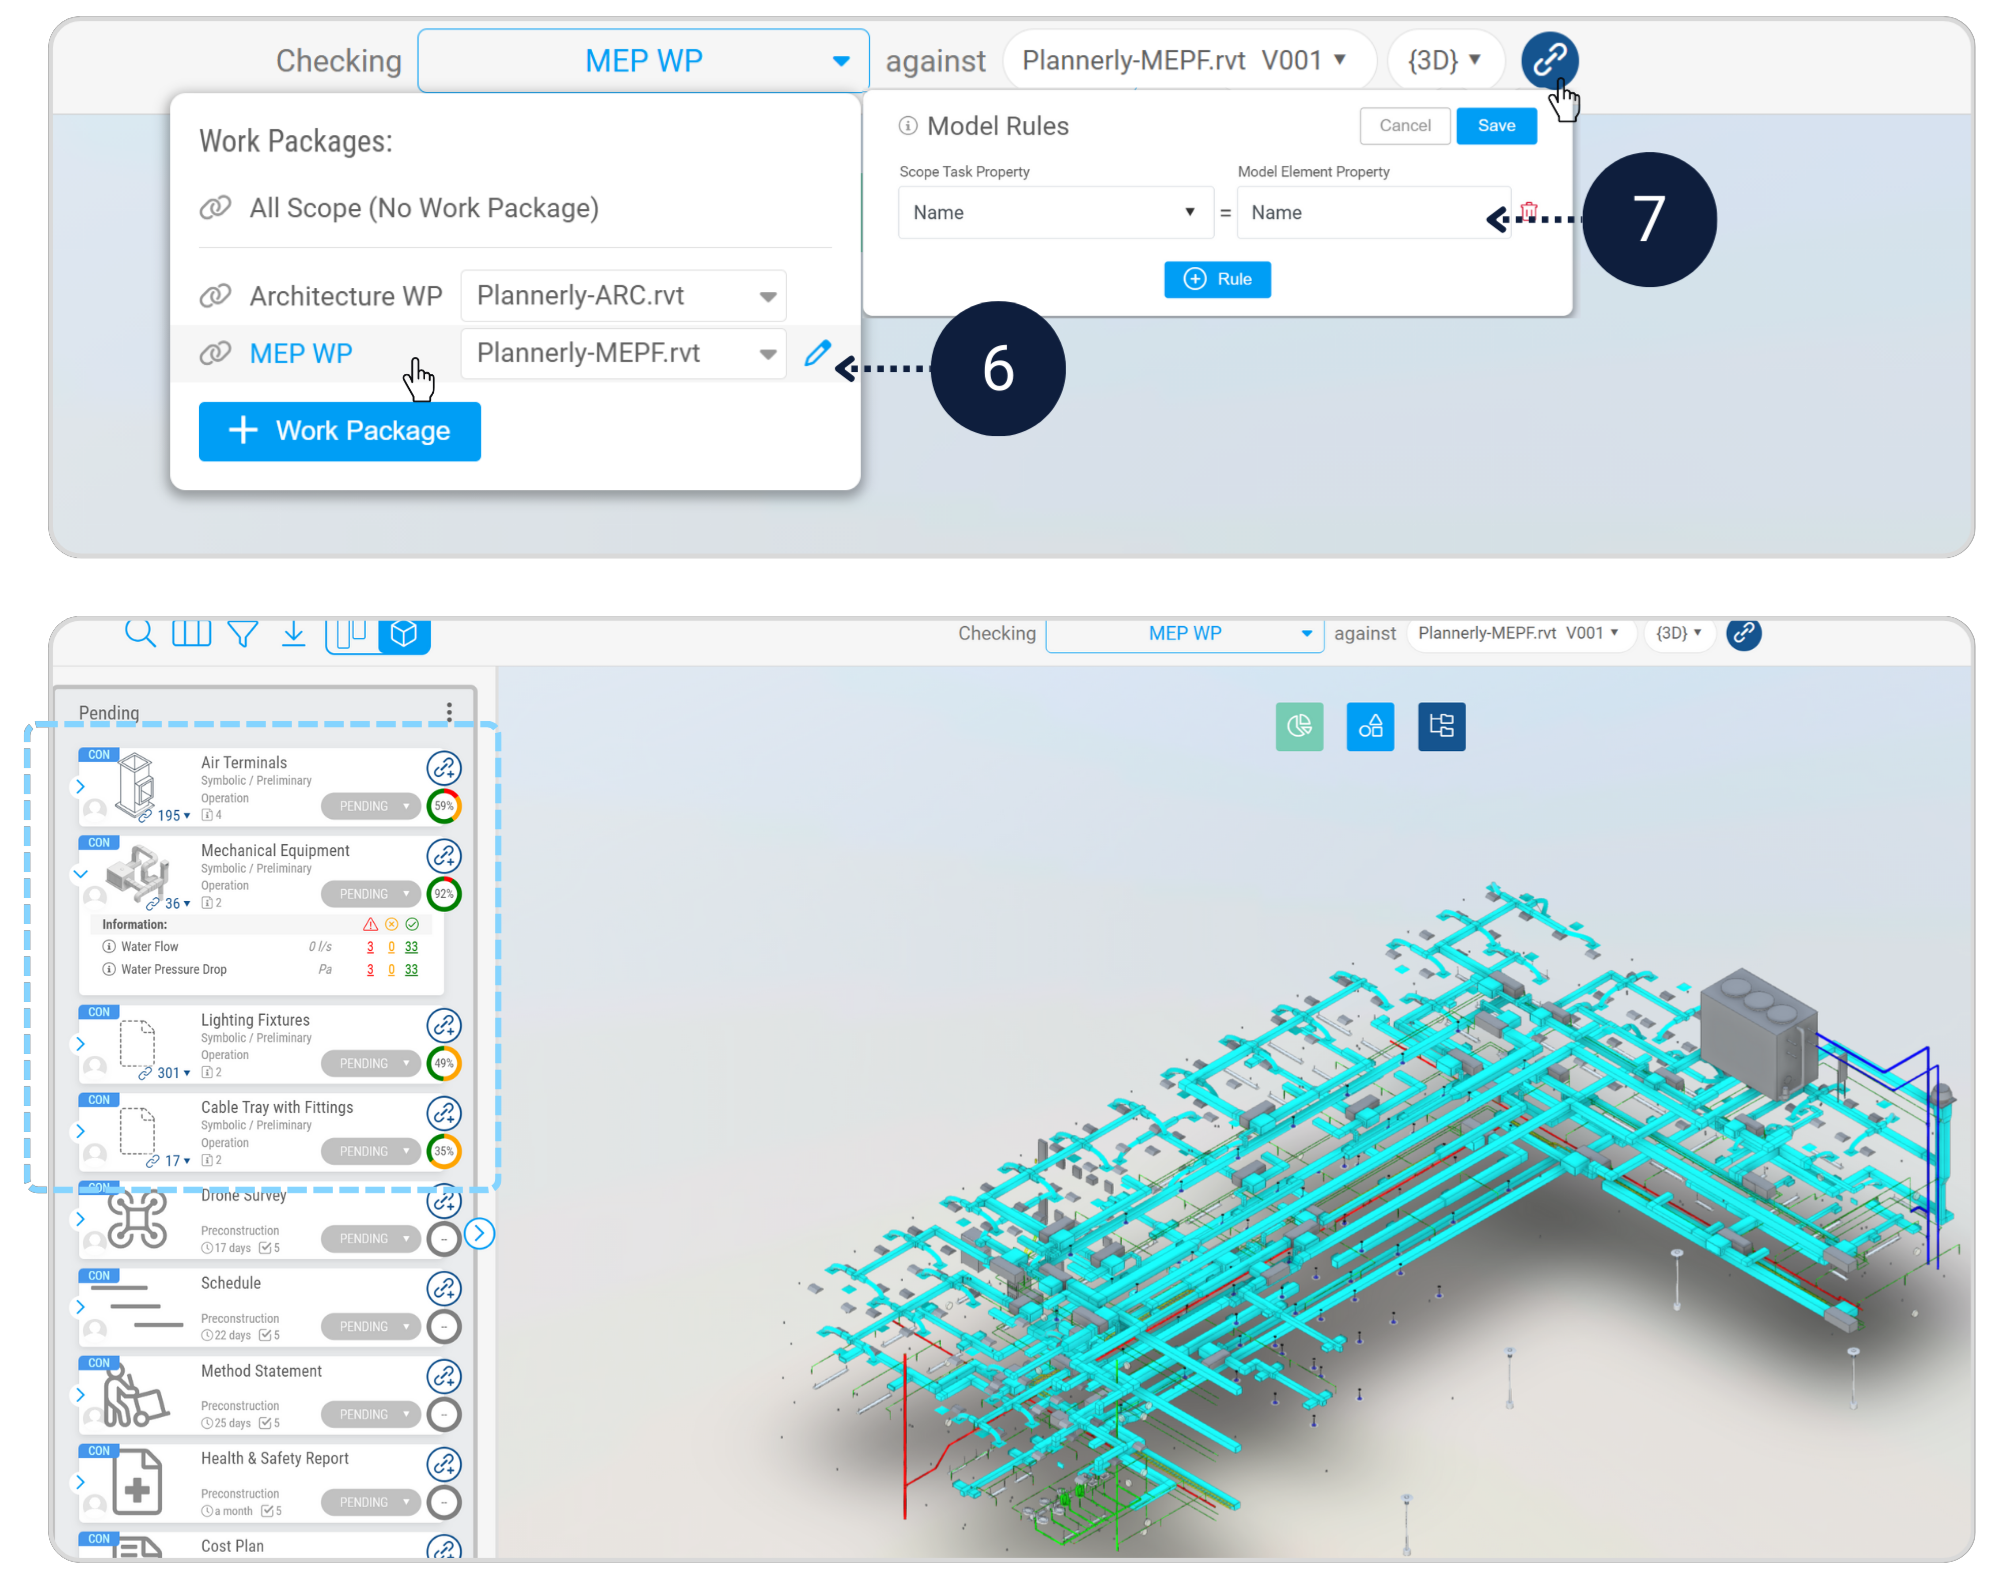
Verify Work packages

In the Verify module, open Model Viewer. In All Scope select Architecture WP.

Set the Model Rule to Name = Name, then review the verification results. Repeat for MEP WP.
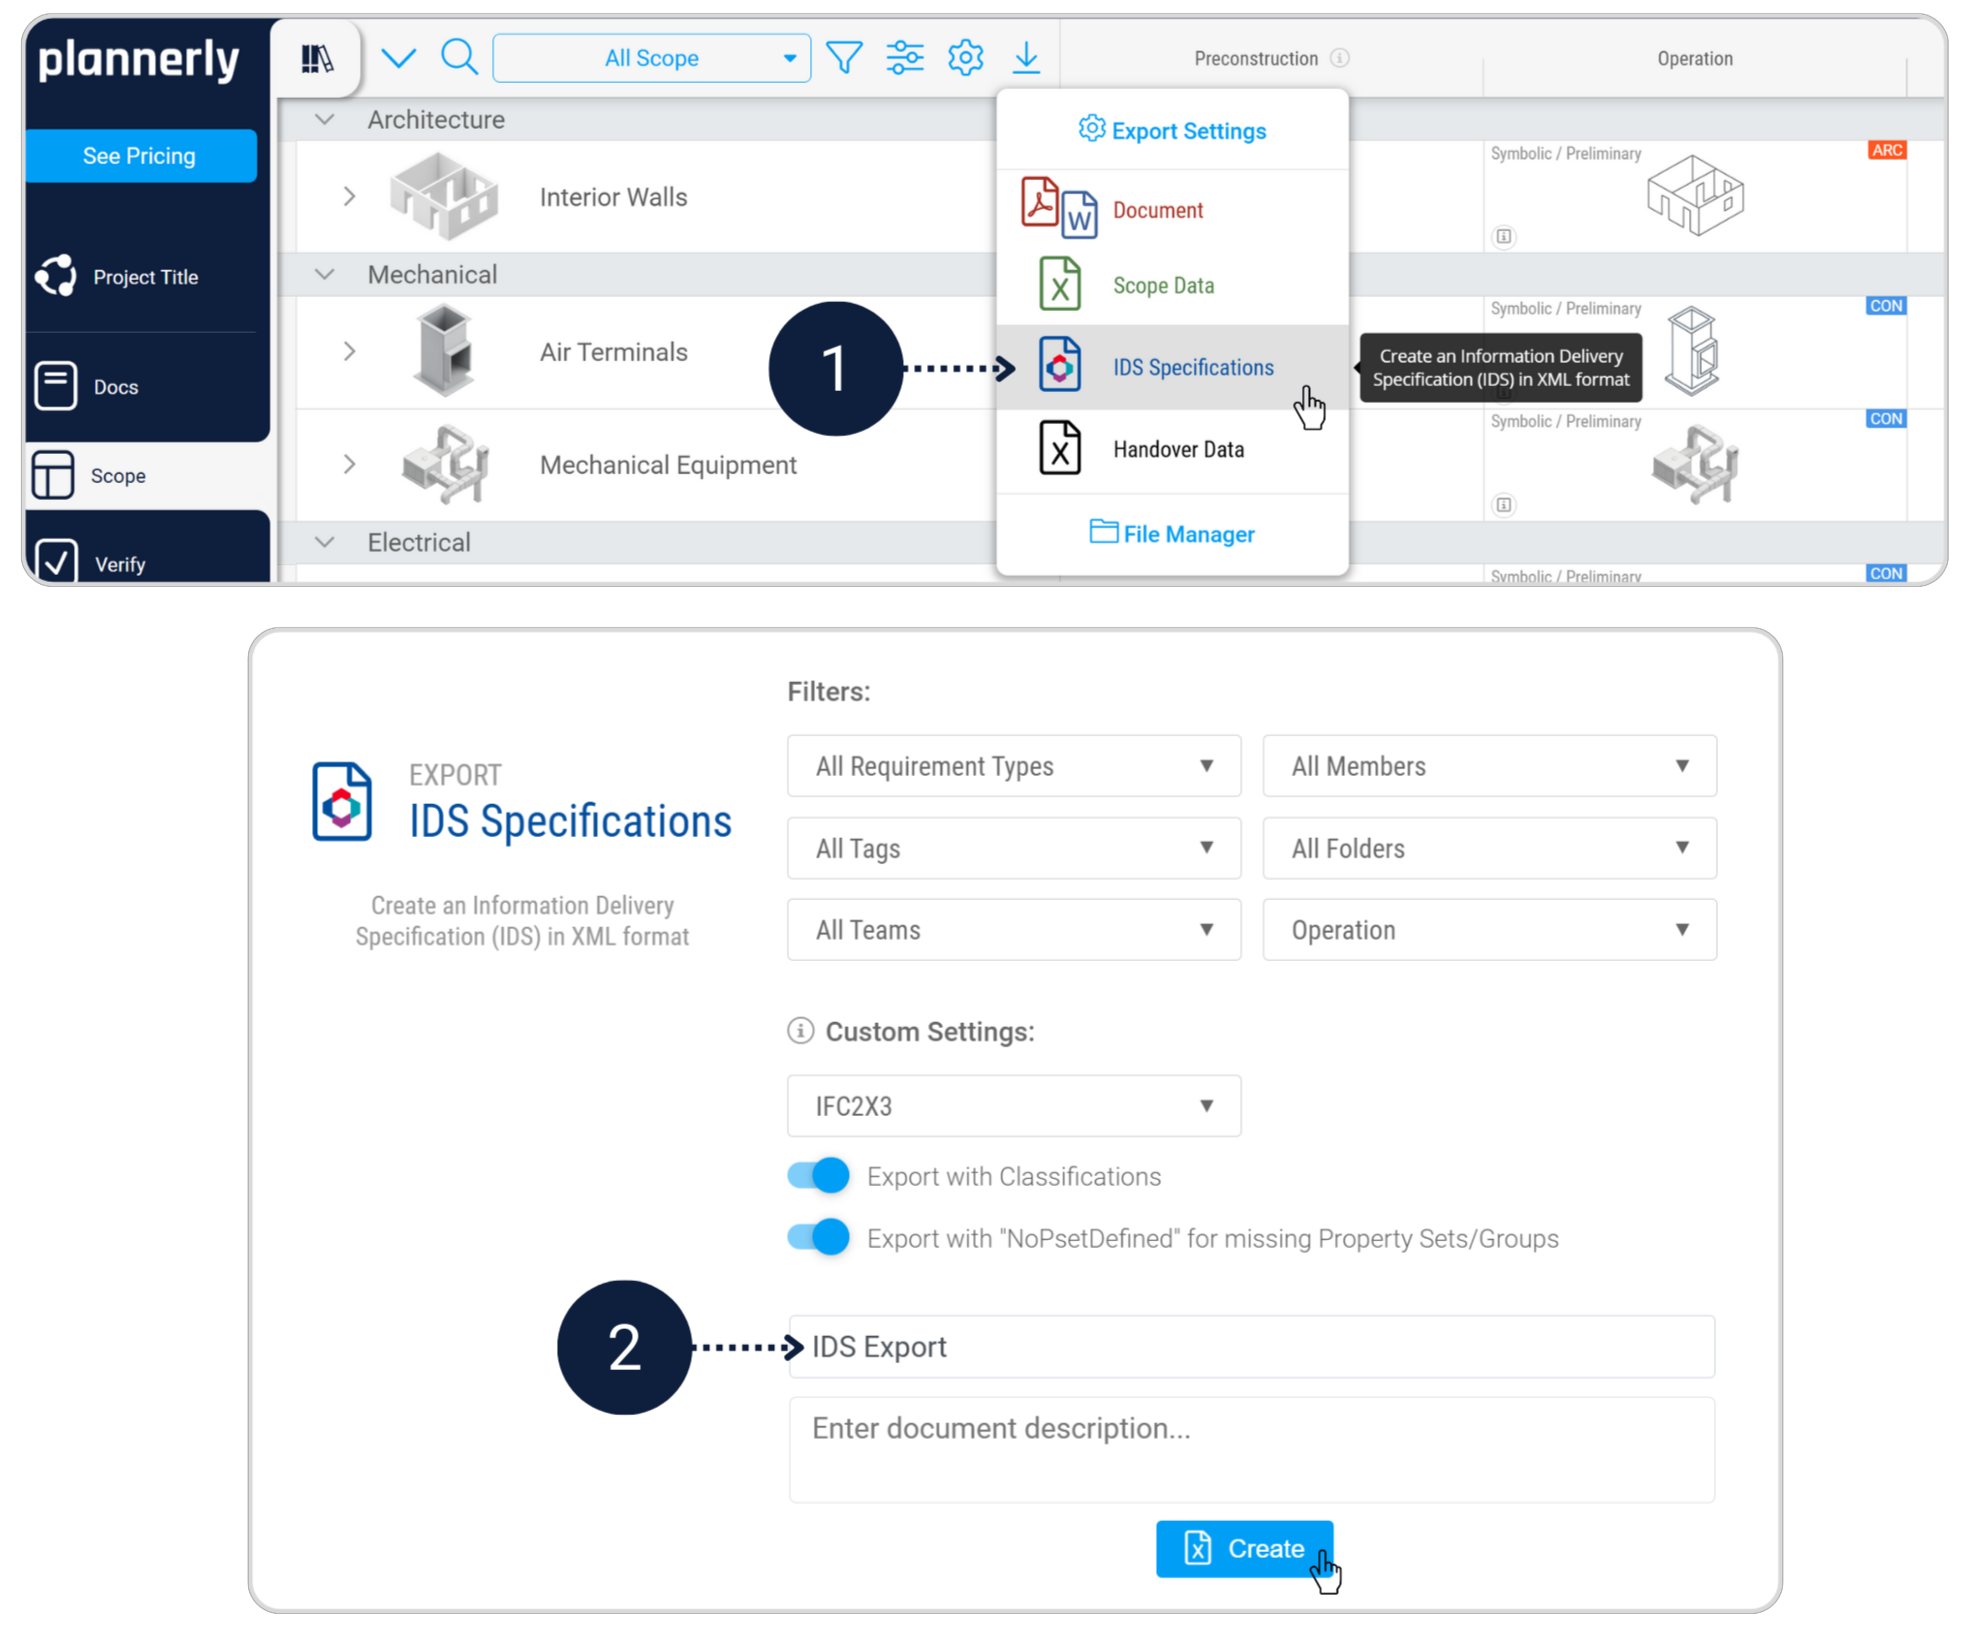
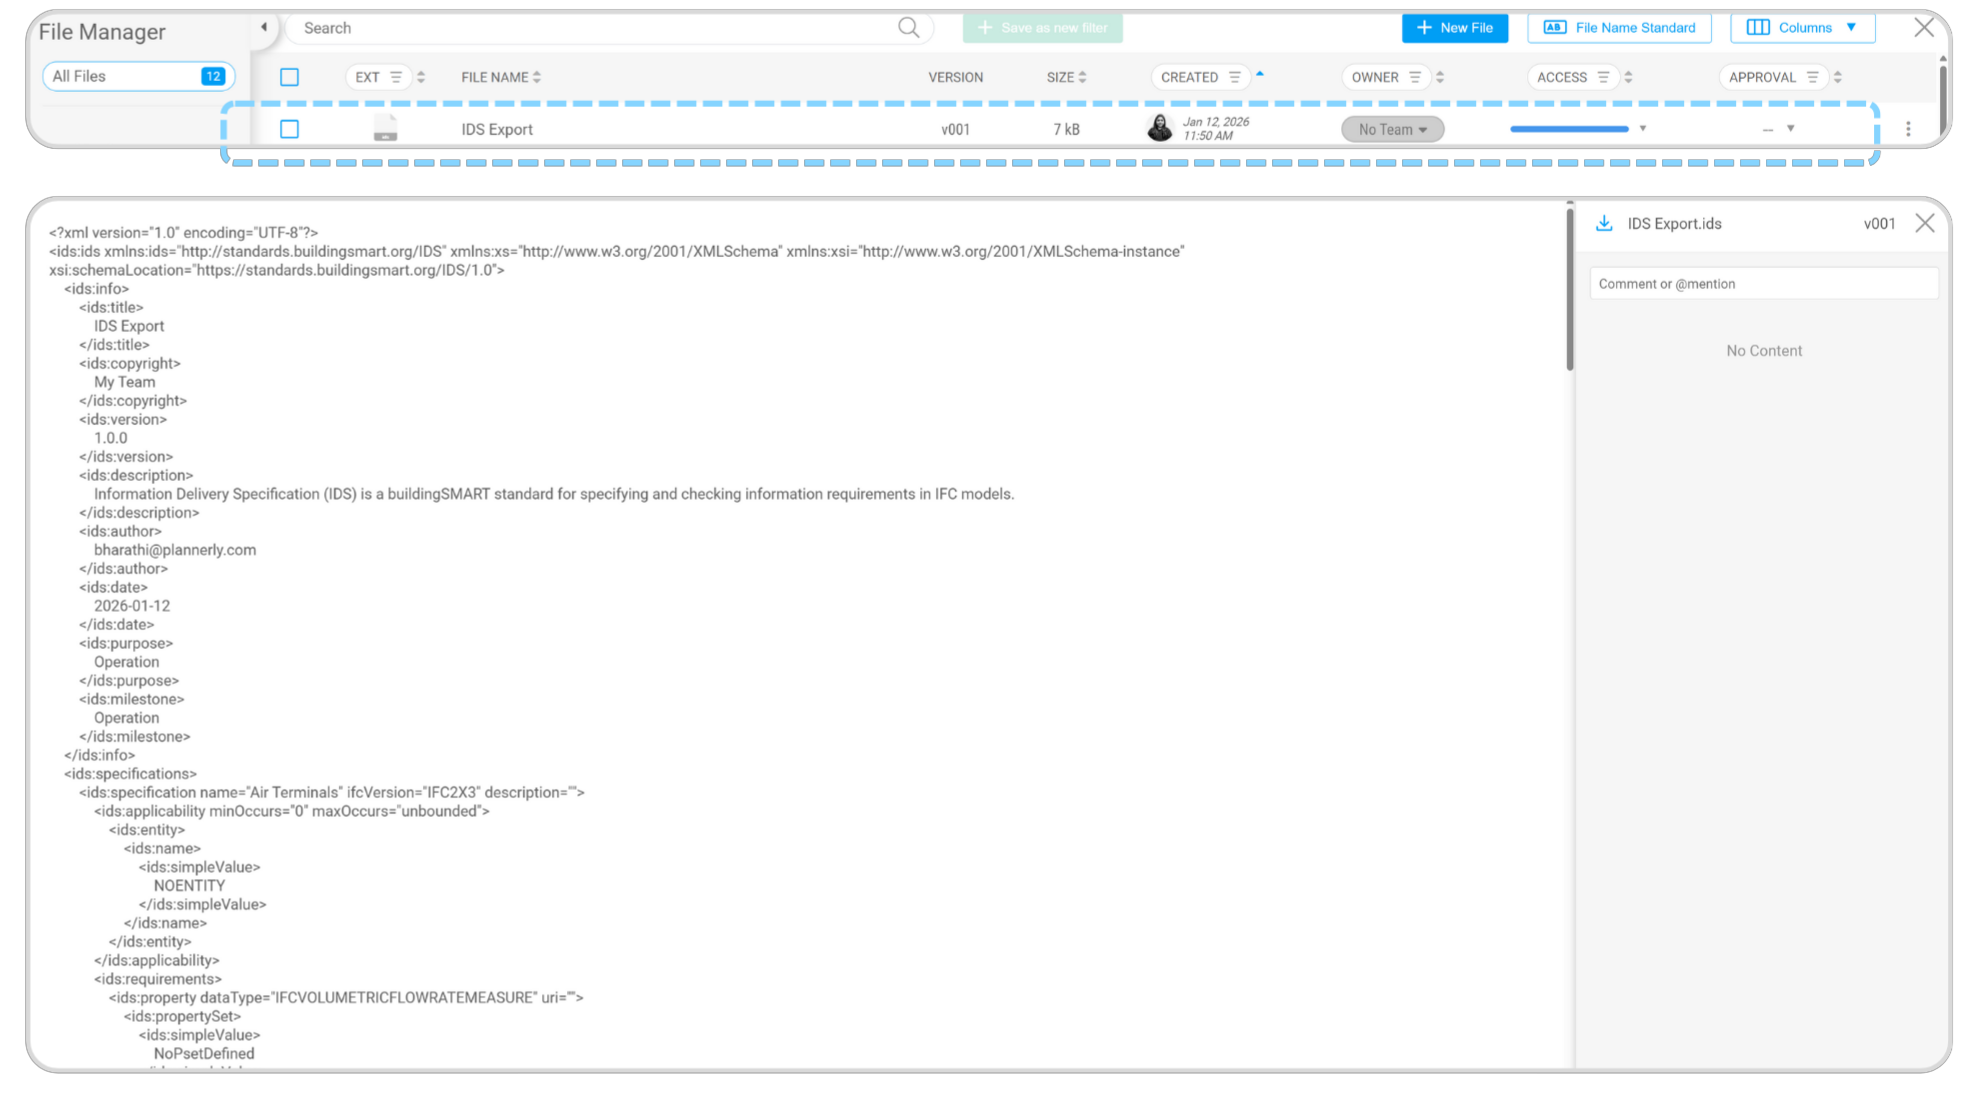
Model Viewer Selecting Scope Model Rules Verification Results
IDS Export

Exporting an IDS creates a machine-readable specification of the information requirements you have defined. This allows requirements to be reused and supports openBIM workflows.

  • Export the IDS Specification file for the verified scope
  • Save the exported IDS file
IDS Export Button Saving IDS

Step 2 - Upload and organise deliverables

Module - File Manager + Verify

This step connects models and documents. Because placeholders were defined earlier (in Task 2), Plannerly can automatically structure the handover.

Upload your project deliverables

Go to File Manager and Upload all extracted files. All required document placeholders will be populated.

In the Verify module, switch to Kanban view and update the task status to Started or Completed.

File Manager Upload Placeholders Filled Kanban View

Step 3 - Finalise, approve, and export the handover

Module - File Manager

As Lead Appointed Party, you now confirm acceptance of the deliverables and export the structured handover data for client use.

Approve documents

Review and approve uploaded documents in the file manager.

Document Approval
Handover data export

Go to File Manager, click New File → Handover Data.

Select Plannerly MEP Model and Filter by COBie requirement type.

Creating Handover File COBie Settings
File Naming Standard

In File Manager, open File Name Standard. Configure the naming rule:

Project ID → Extension → Created By (Team Abbr.) → Version

Naming Standard Settings Naming Standard Applied
For handover data, set the approval status and request signatory acceptance to complete handover.
Signatory Request
How to Video - To be Uploaded